This “Robotic Fabrication and Assembly Processes: Prototyping Construction Tools” design option studio (Fall 2019) investigated strategies for robotically-assisted construction processes combining conventional and emerging material technologies. Specifically, it focused on designing and prototyping of the task-specific robotic end-effectors (custom fabrication tools) for the ABB 4600 robotic arm. Students worked with embedded components (sensors, actuators, and microcontrollers) to design automated toolsets capable of performing particular construction assembly/fabrication tasks. These tasks mimicked human-labor abilities and proposed novel ways of assembling architecture. Students also used these custom-designed end-effectors with the robotic arm to produce simple construction assemblies.
The outcomes of the studio included a series of construction assemblies produced with student-designed end-effectors, functional prototypes of the end-effectors, and the documented demonstration of the robotic construction abilities. The student work was also covered by the Study Architecture blog and NJIT News.
Brick Laying End Effector
The project team: Meraj Nasi, Jalaysia Stevenson, and William Hall developed two end-effector modules (brick grippers) that were integrated with the (1) RGB color sensor and (2) radio frequency identification (RFID) sensor. These gripper enhancements allowed for more targeted selection and manipulation of bricks and construction components by being able to recognize and track individual bricks.
The team’s interest in working on a conventional brick assembly using unconventional tools and techniques originated from the observation that the brick laying jobs are highly labor demanding with a significant impact on workers’ health and well-being. To expand on the current state of the robotic construction approaches, not to replicate it, the team propose and integration of various sensors with conventional pneumatic grippers.
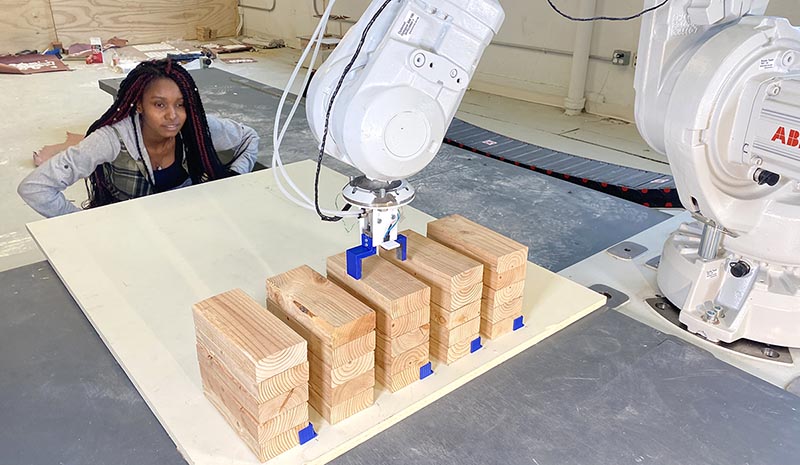
Student Jalaysia Stevenson NJIT’21 tests gripper alignment for brick stacking exercise.
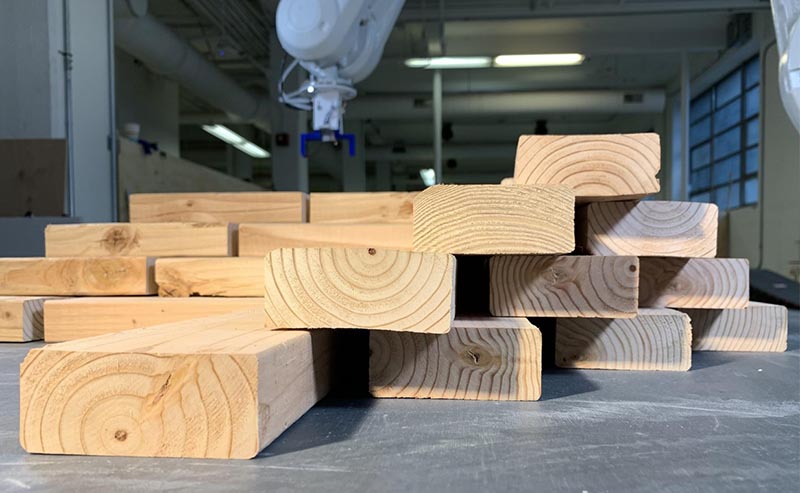
Initial brick laying test
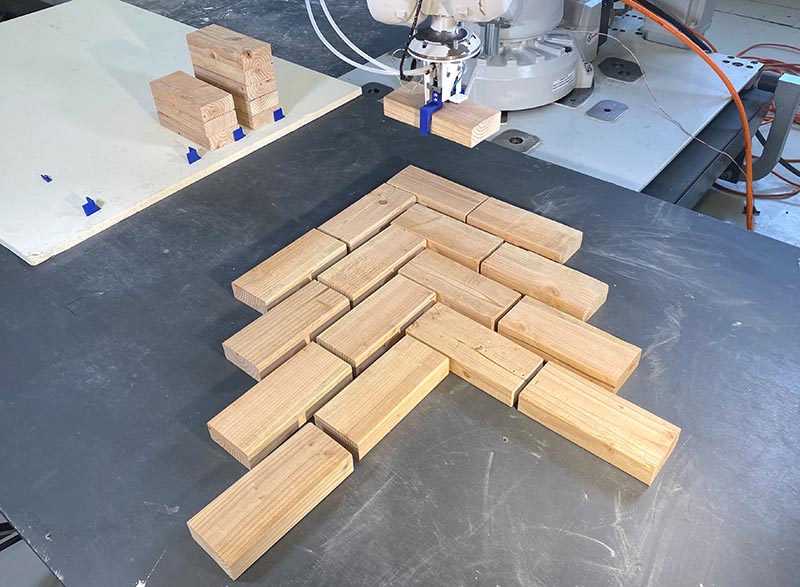
Dry stacking of wooden bricks
What’s New About This End Effector?
Students Jalaysia Stevenson NJIT’21 (left) and Meraj Nasi NJIT’21 (right) discuss their design for the color-sensing brick laying end effector. The TCS34725 RGB sensor allows the robotic arm to recognize components of a specific color or the range of colors.

Custom designed RGB-color sensing pneumatic brick gripper
An TCS34725 RGB color sensor was used to enable the gripper to distinguish between brick colors using Kelvin scale. In this video students test various color chips to set up appropriate tonal ranges for bricks. An RGB color sensor controls deployment of the gripper. In this video, the reddish color is set to actuate a pneumatic actuator. Other colors will not trigger the end effector.
The end-effector test deployed on the ABB 4600 robotic arm demonstrates color-based gripper actuation.
Stacking Patterns: Forms


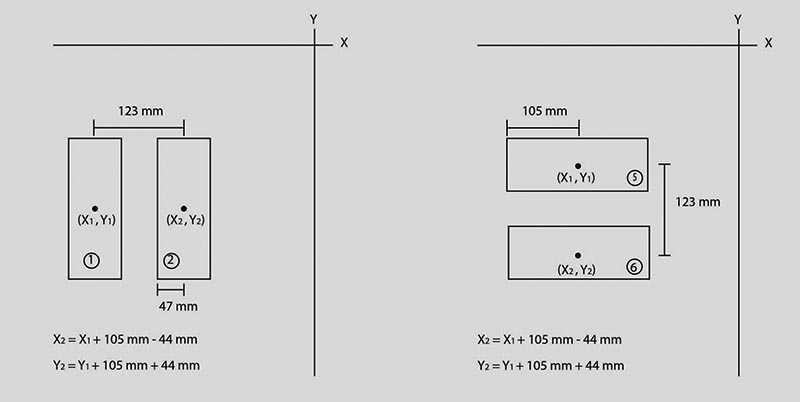
Stacking Patterns: Geometry

Brick stacking trigonometric relationships

End Effector: Design + Components
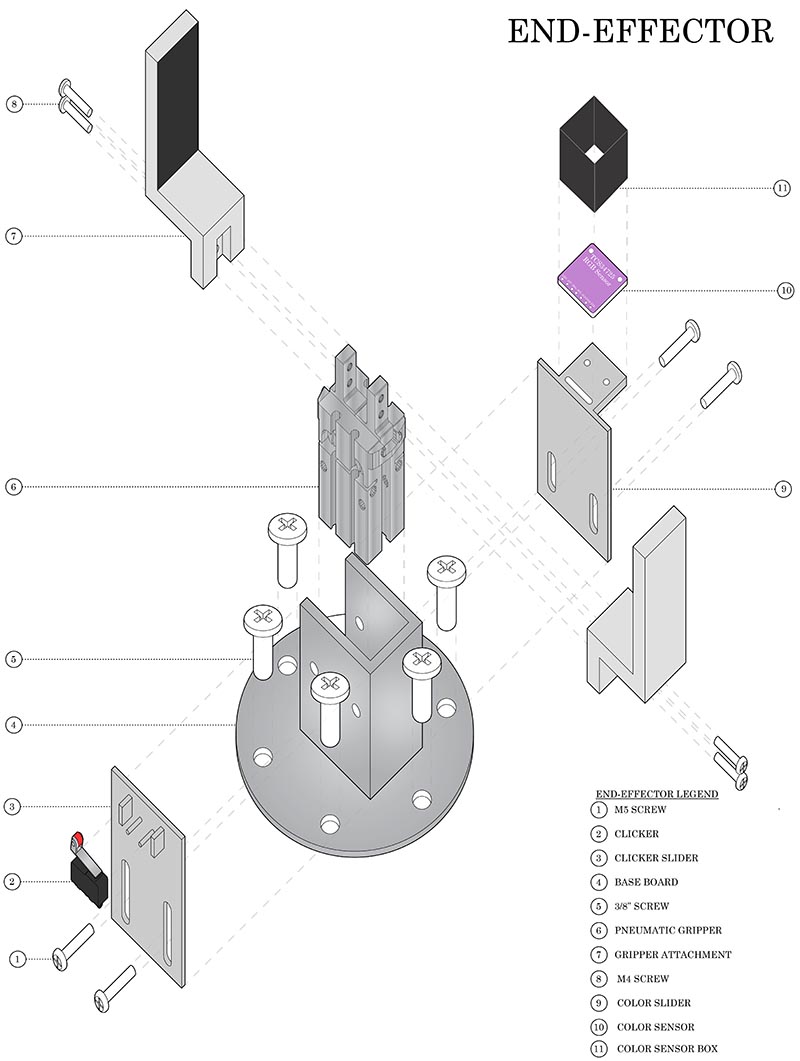
Exploded view of the color-sensing gripper.
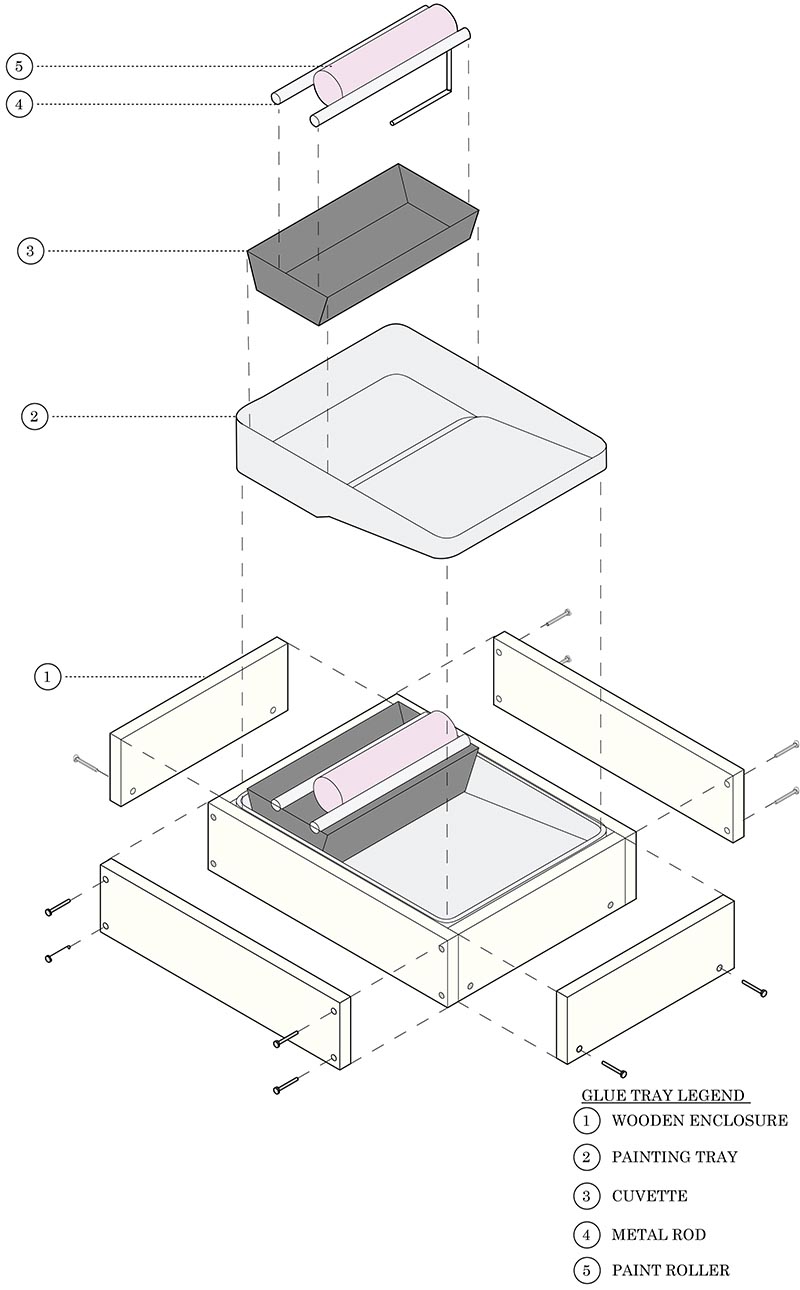
Glue tray design

Pneumatic gripper control panel including solenoid valve, relay, and Arduino microcontroller.
Clay Extruding End Effector
Project team: John Braun, Renzo Eseo, and David Skup NJIT’20 have developed pneumatically-powered clay extruder/3D-printing end effector. The team would like to extend sincere gratitude to Ms. Toni Boccanfuso for help with firing clay panels and providing guidance with clay glazing and processes.

Project team: John Braun (left), Renzo Eseo (center), and David Skup (right)

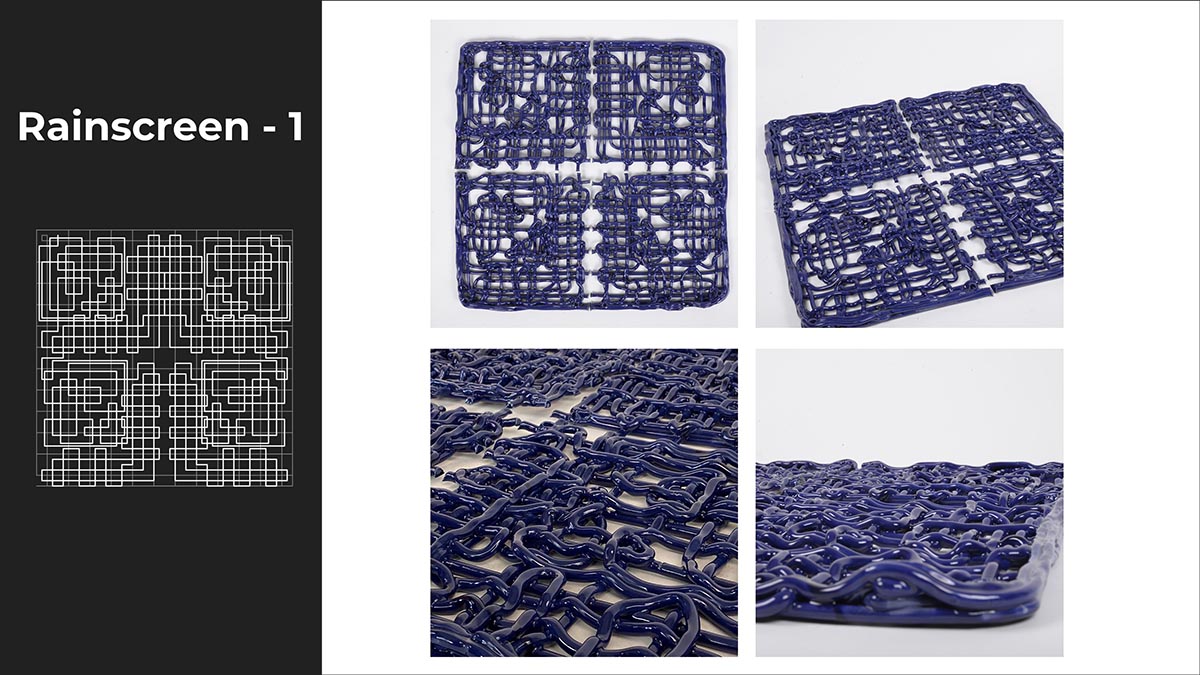
Ceramic rainscreen panel produced with the custom-designed clay-extruding pneumatic end effector. The panel was glazed with Sax True Flow Gloss Opaque Glaze– Mosaic Blue. This glaze has unusually bright and vibrant colors for a non-toxic series. It is also freeze and thaw stable.
Ceramic rainscreen panelization. While the original panels were extruded (3D printed) in large sizes of ~24 by 24 inches (60 by 60 cm), they were cut into smaller sections 12 by 12 inches (30 by 30 cm) to fit the kiln.

One of the final deliverables was a ceramic rainscreen wall assembly mockup designed to serve as a traditional rainscreen panel and as a curtain wall mounted solar screen.
Extruder: Components
Assembled pneumatic extruder (end effector)
Processes and Products
The first step in preparing for a clay extrusion exercise was to level the printing bed and test the pattern with a ball pen.
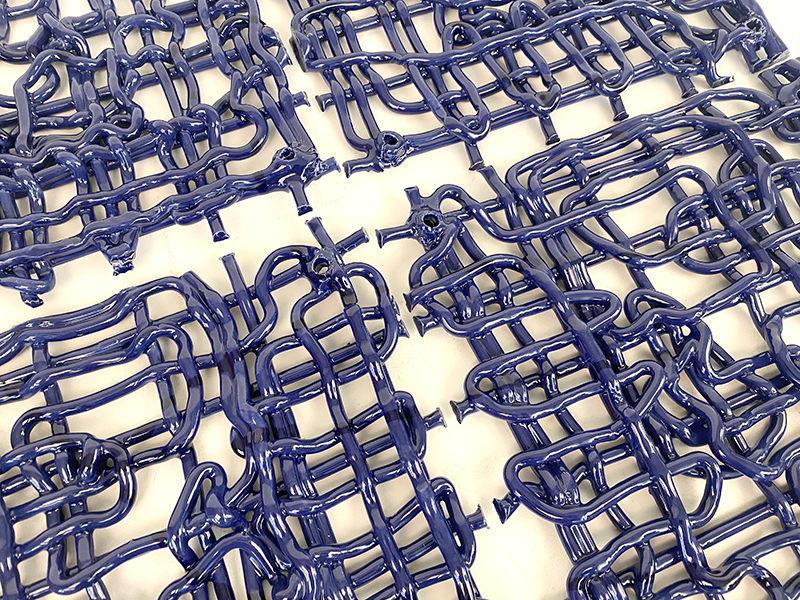
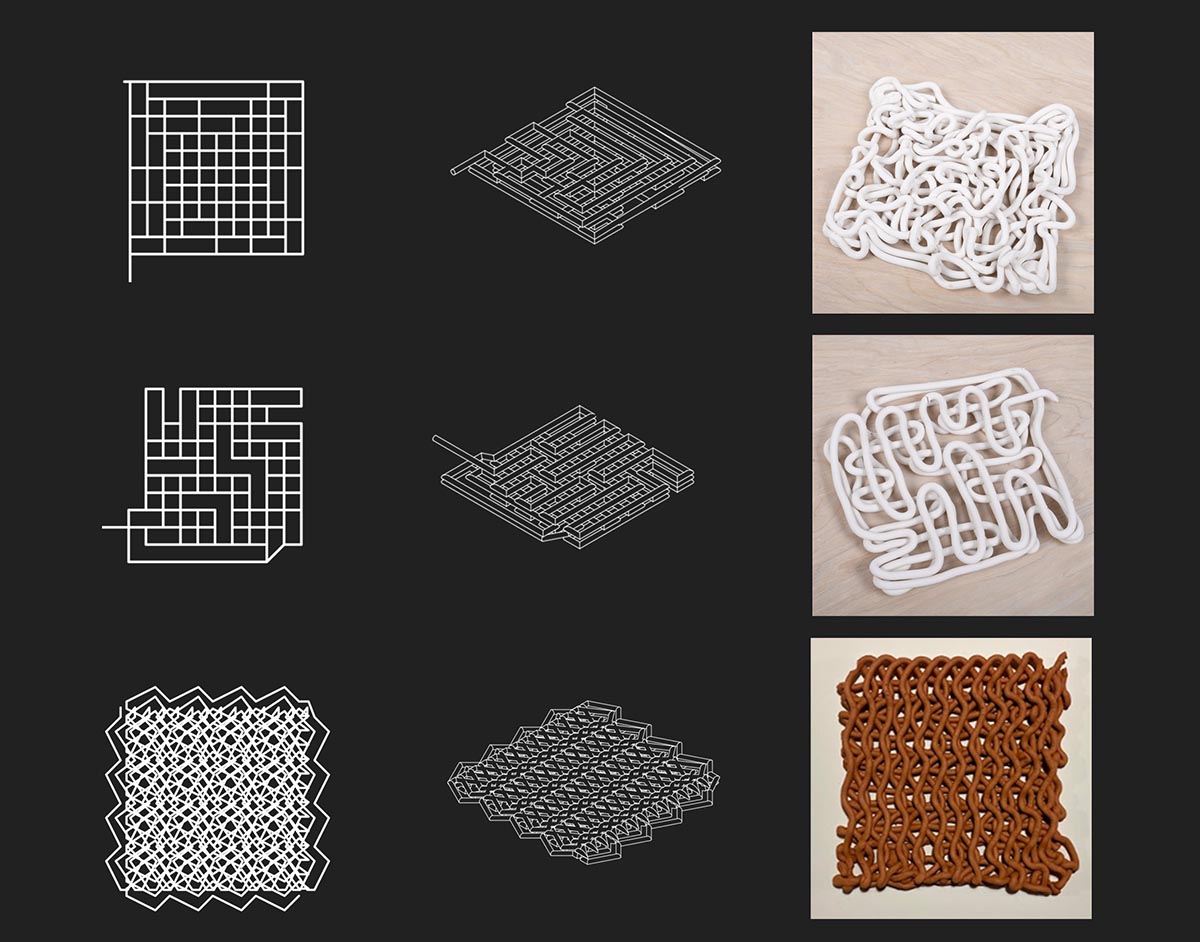
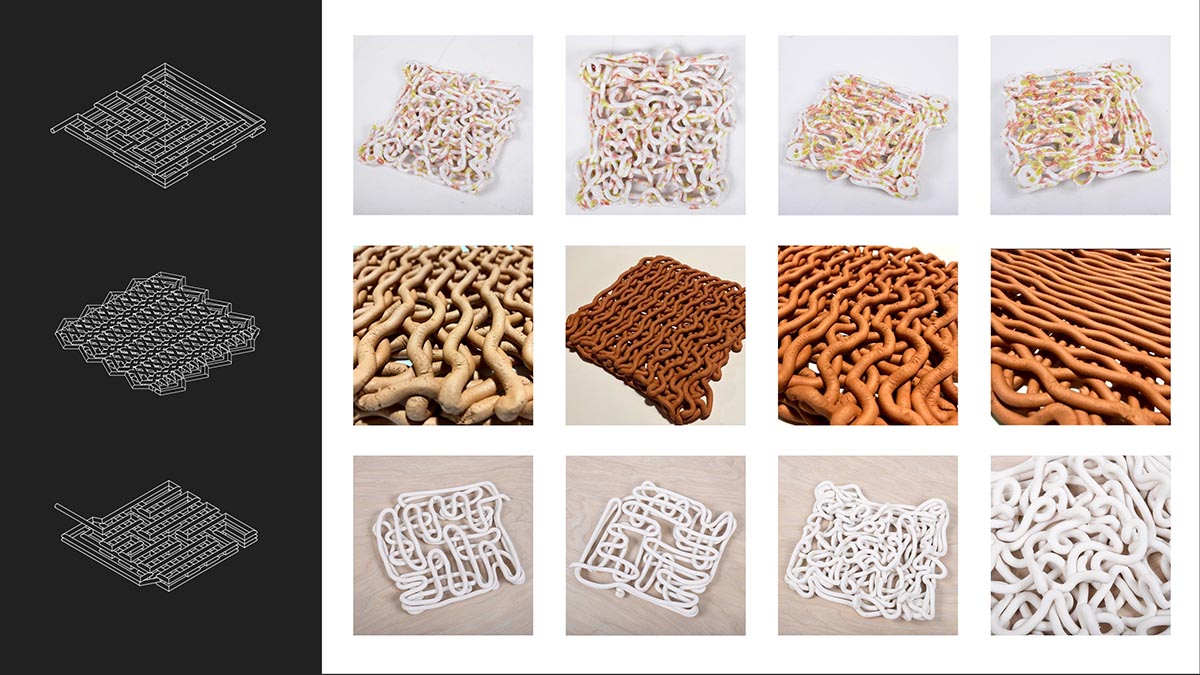
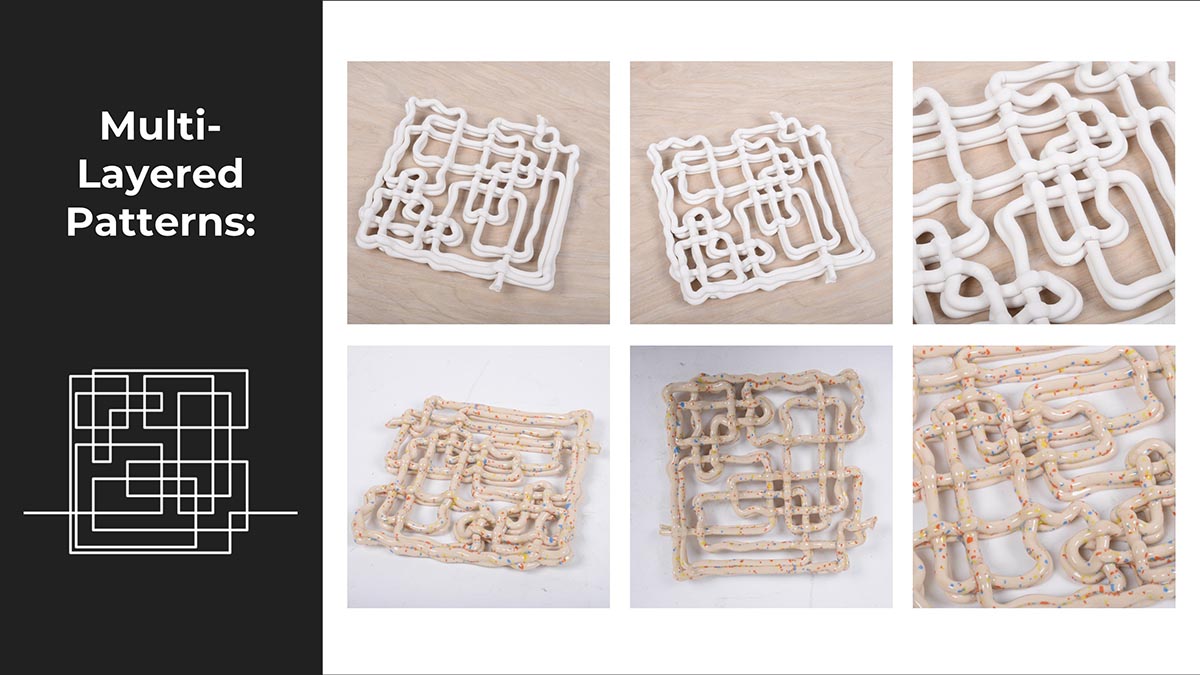
3D brick prints. The speed and/or air pressure variations resulted in different line curvature of clay depositions.

Achieving wavy, more curvilinear and ornamental extrusion forms.

A double-printed ceramic panel demonstrates the level of consistency of clay extrusions. This technique was also used in larger panels to reinforce them (increase their strength).
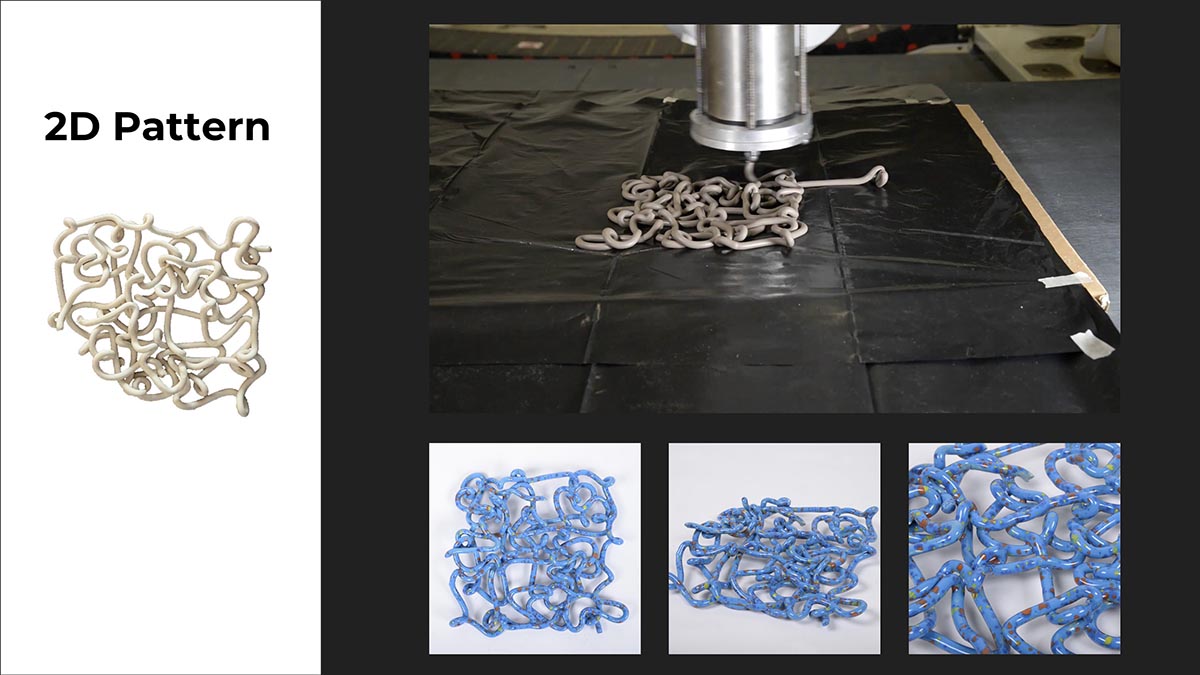
This video demonstrates clay 3D printing as a single layer deposition with a pattern interlocking to increase the structural strength of the final panel as well as to reduce panel deformations associated with the initial drying of the raw clay material. This is an clay extruding head close up video showing the speed and relative distances of between the depositing tip and the panel base.

Examples of 2D patterns tested with clay extruder

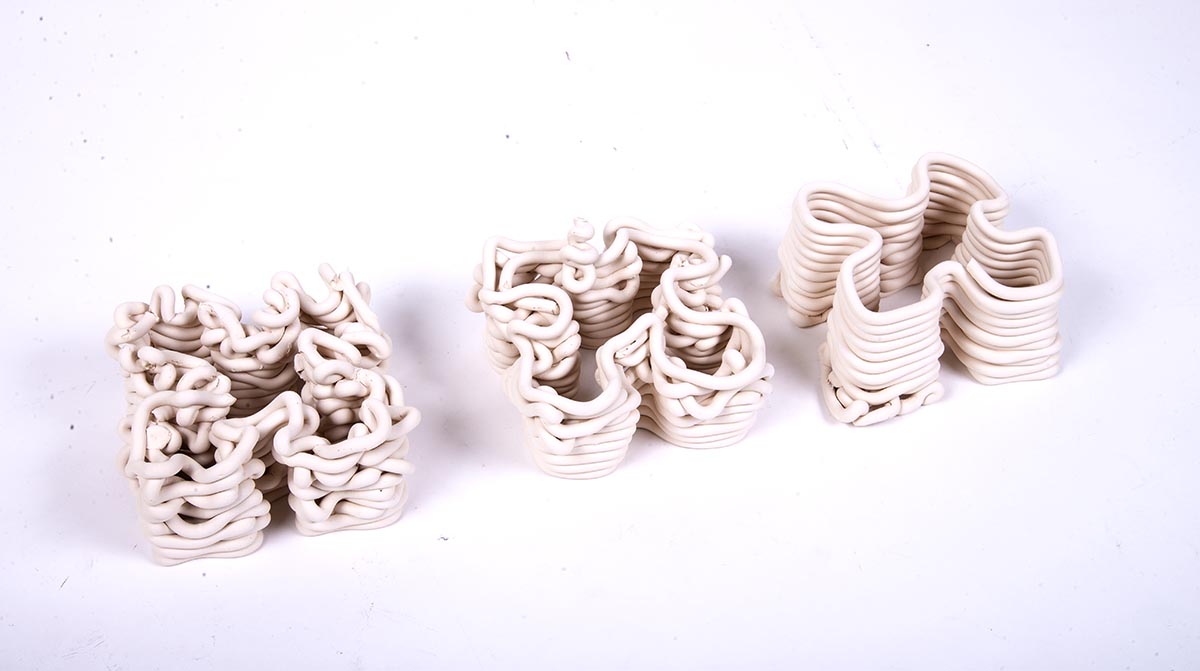
Multi-Layer Patterns

Bricks: Spatial Clay Prints
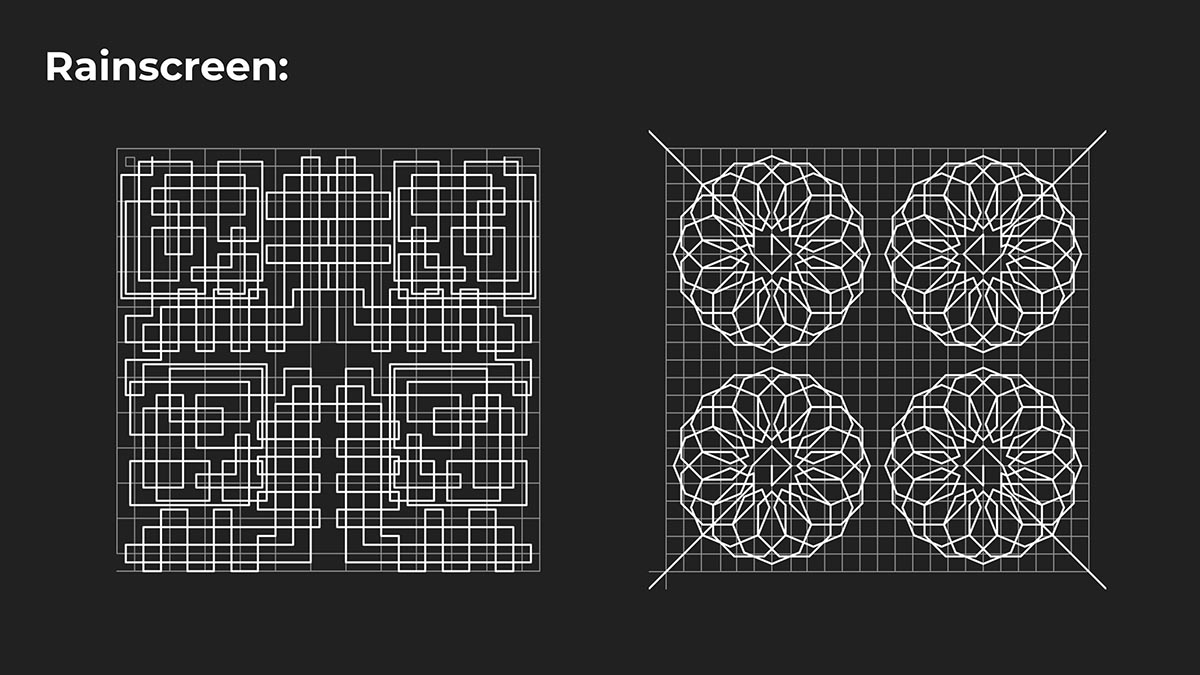
Rainscreen panels
The rainscreen panel used for the final wall assembly mockup
Clay Extrusion: Components
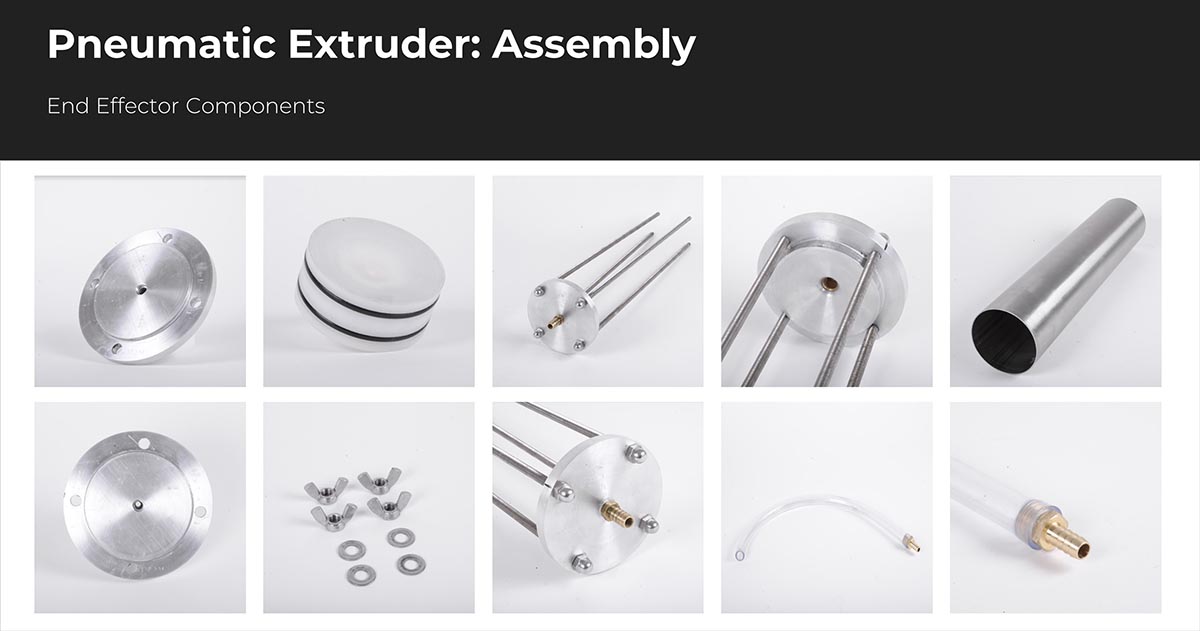
Components of the pneumatic clay extruding end effector developed by John Braun, Renzo Eseo and David Skup.

The clay extrusion was testes with multiple nozzles to evaluate the most effective depositing tip.
Clay Extrusion: Material Preparation

Two clay types were used for the pneumatic extrusions. Buff Stoneware Clay No.46 (Cone 5) was used as the primary extrusion material. Additionally, Terra Cotta Stoneware Clay No.77 (Cone 5) was tested and fired. After multiple tests the team established that the Buff Stoneware Clay was easier to work with and provided more consistent results while extruding and drying. The image above shows clay specifications and characteristics.
Clay Extrusion: Practices and Considerations

Tests were logged and annotated with parameters used for the extrusions. This was a critical part of the development process and successful outcomes.
Material Injections
Vincent Hu and Patrick Quinn researched robotically-controlled uncured concrete and plaster injections to shape surface expressions and material consistency as part of the Robotic Fabrication and Assembly Processes project.

Liquid material injection end effector
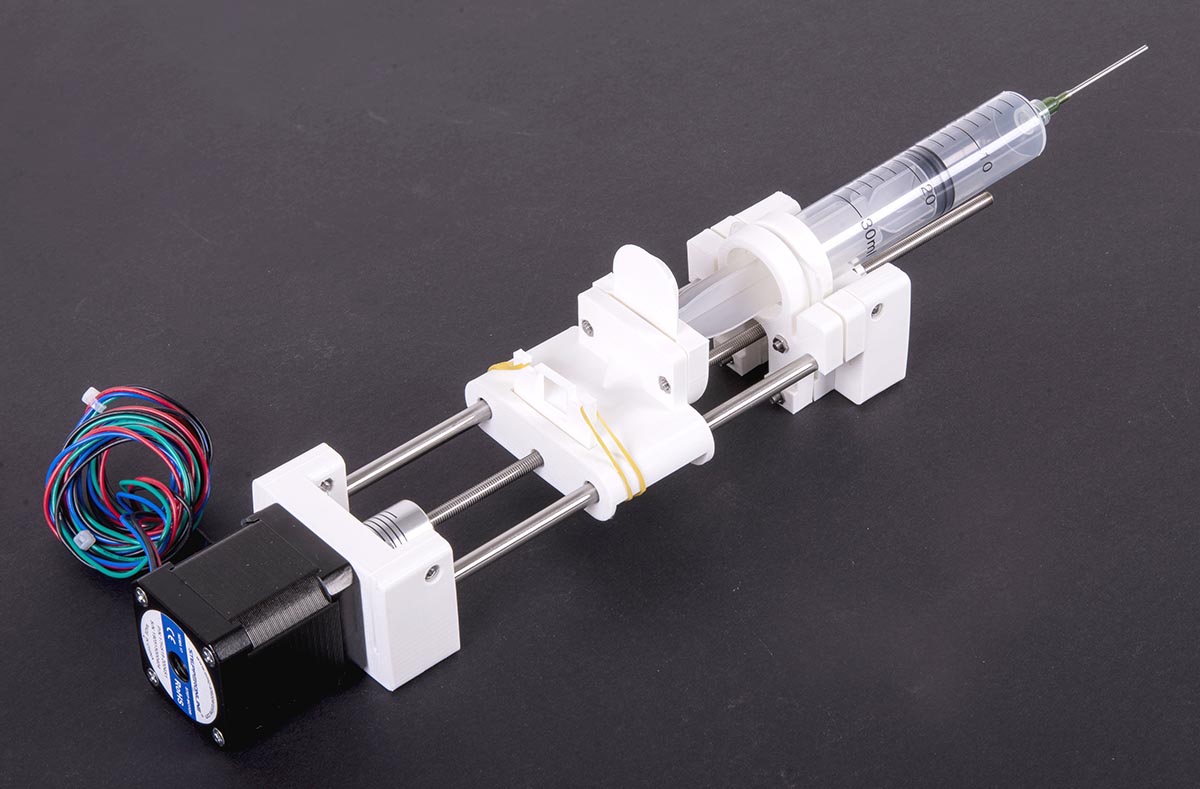
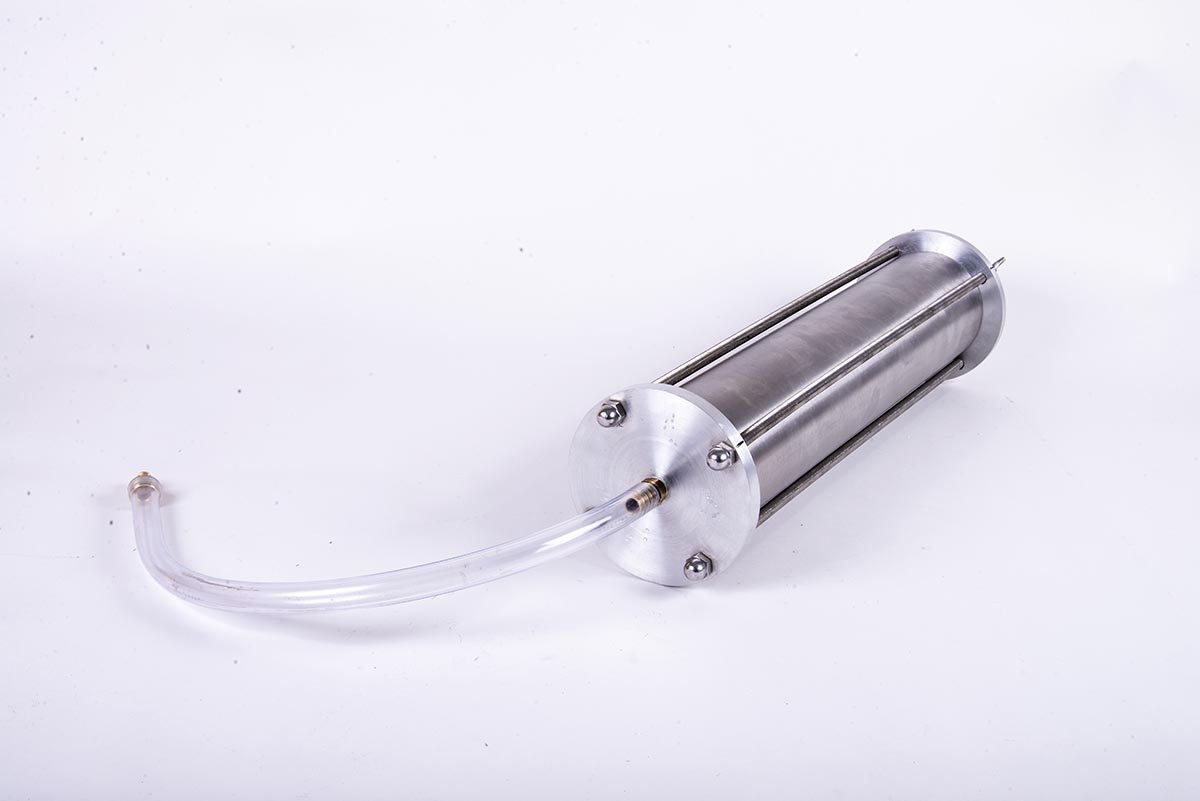
Assembled 3D printed injector
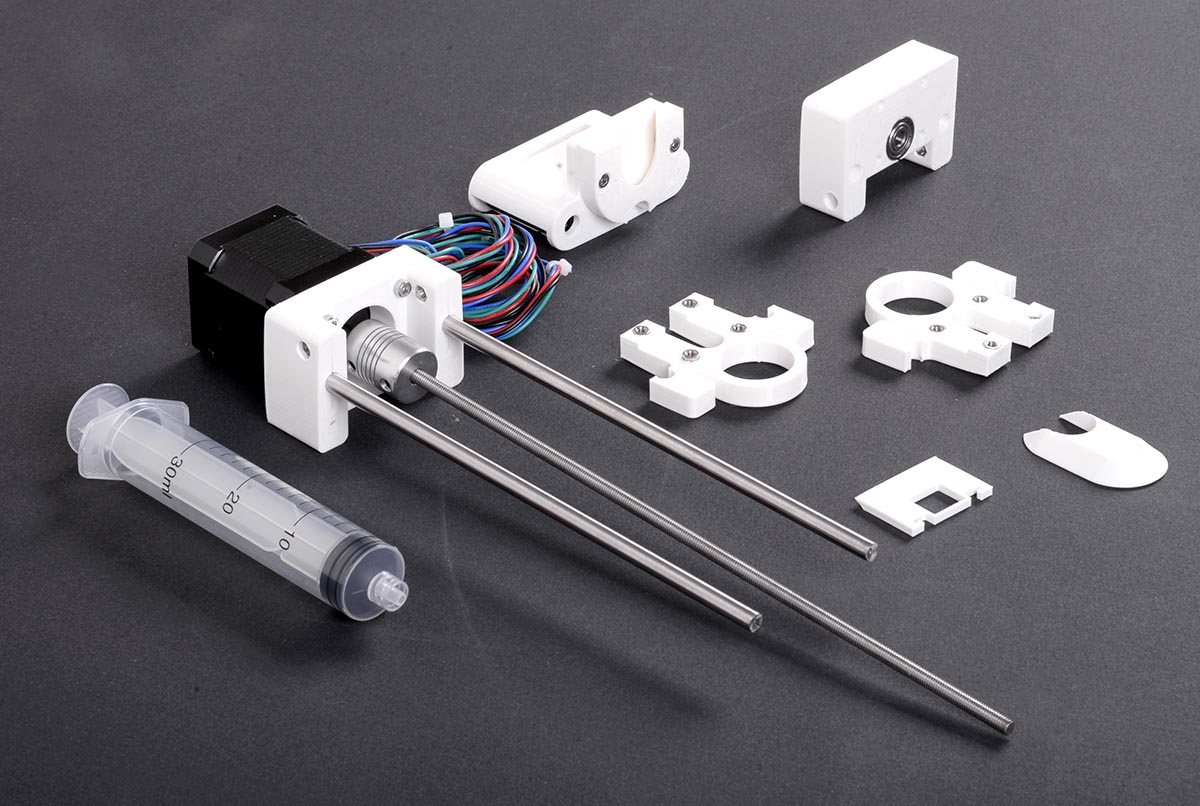
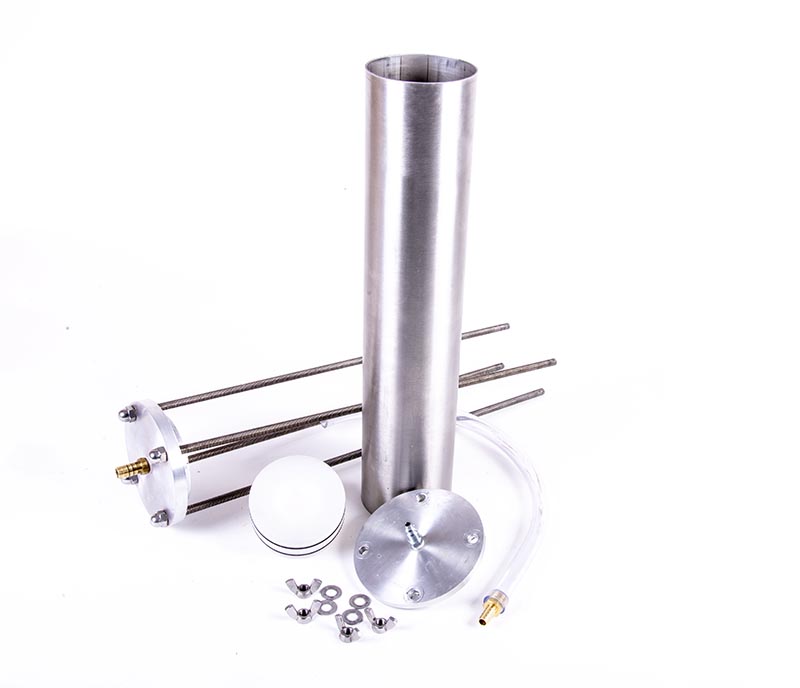
Injector components

An injection end effector mounted on the robotic arm
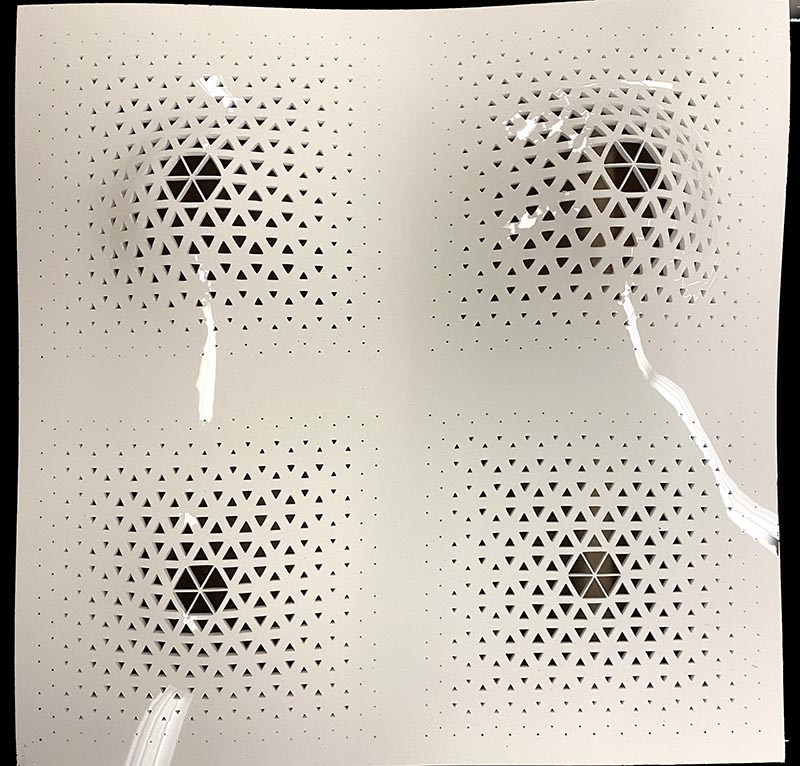
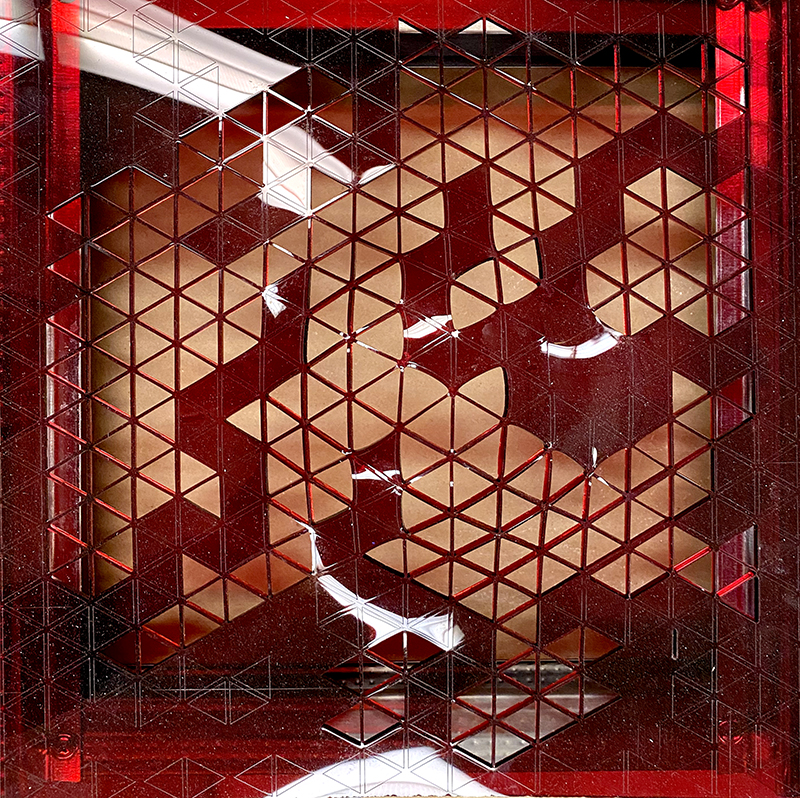
Outcomes: Panels and Surfaces
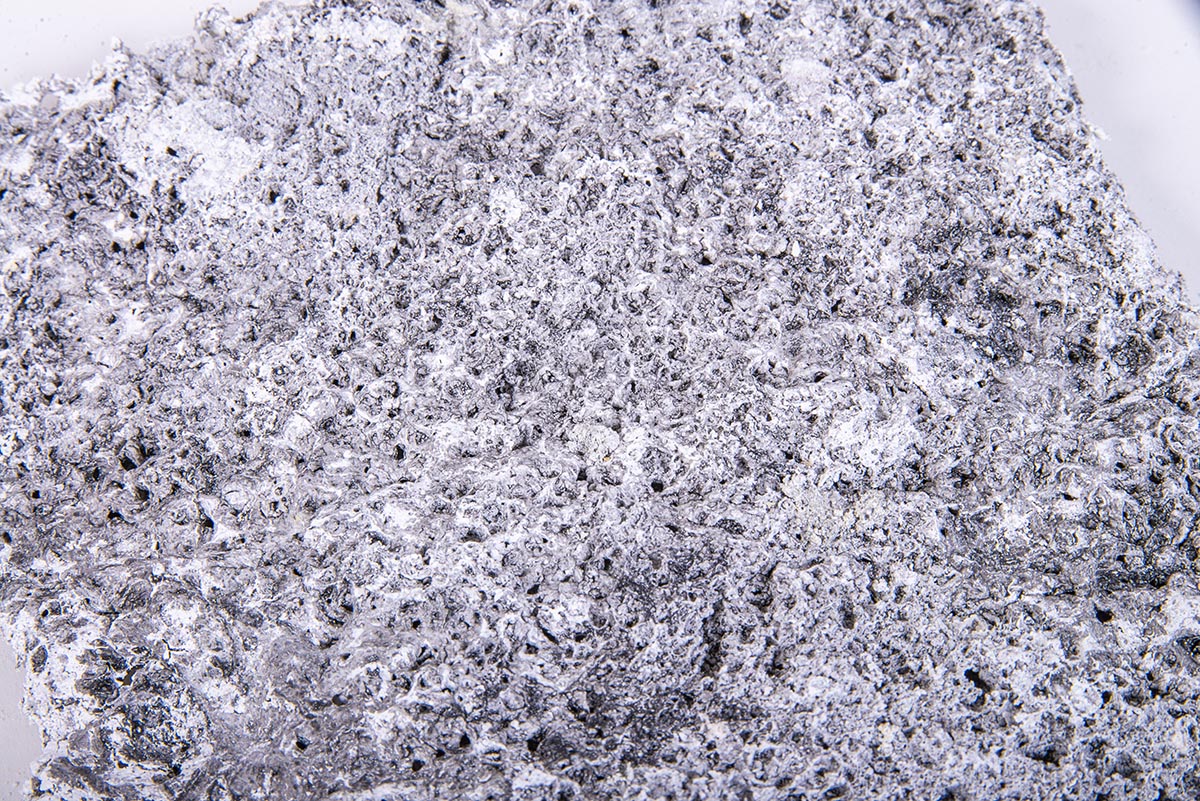
Panel 1

Panel 2

Panel 3

Panel 4
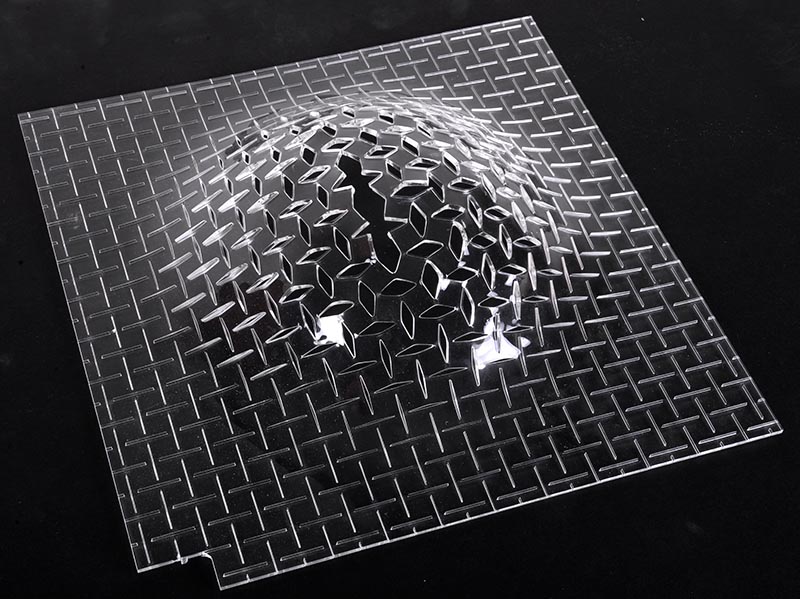
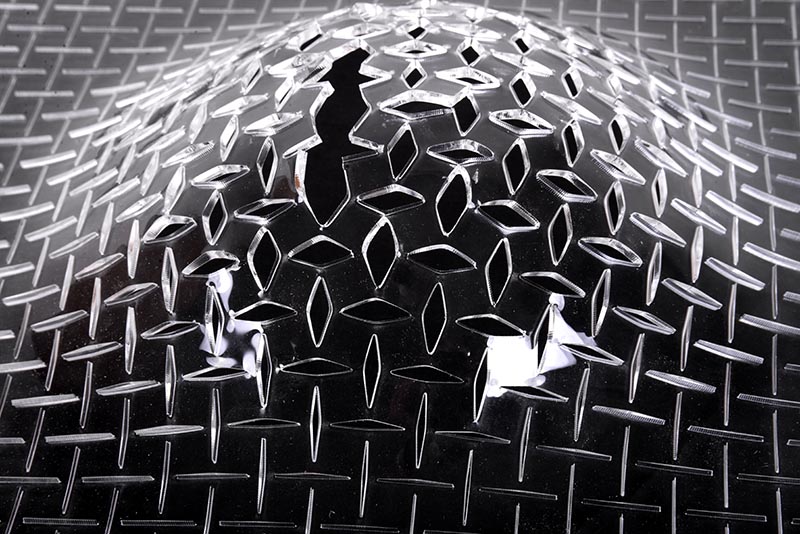
Facade Panel Thermoforming
Ramez Hanna, Angela Micevska, and Steve Vivar developed robotically-controlled thermo-forming process for mass-customized facade panels as part of the Robotic Fabrication and Assembly Processes project.
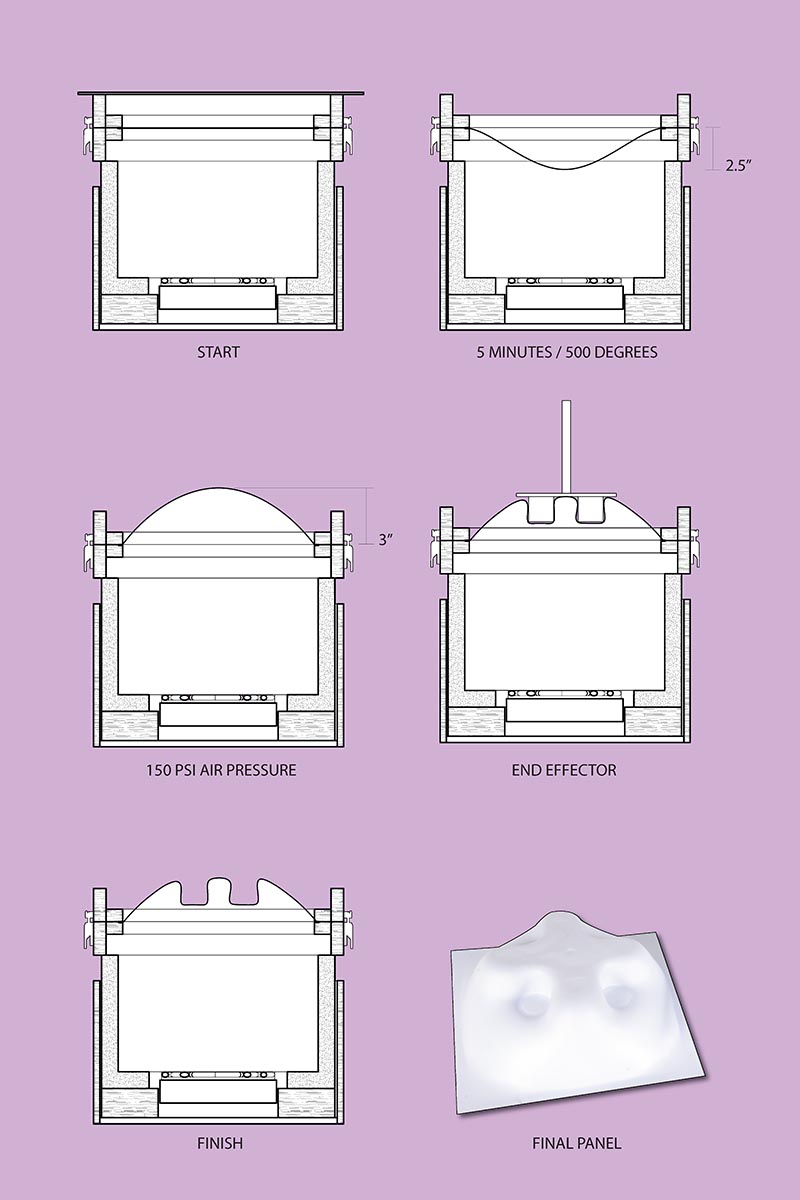
Thermoforming process
Assembly Diagrams
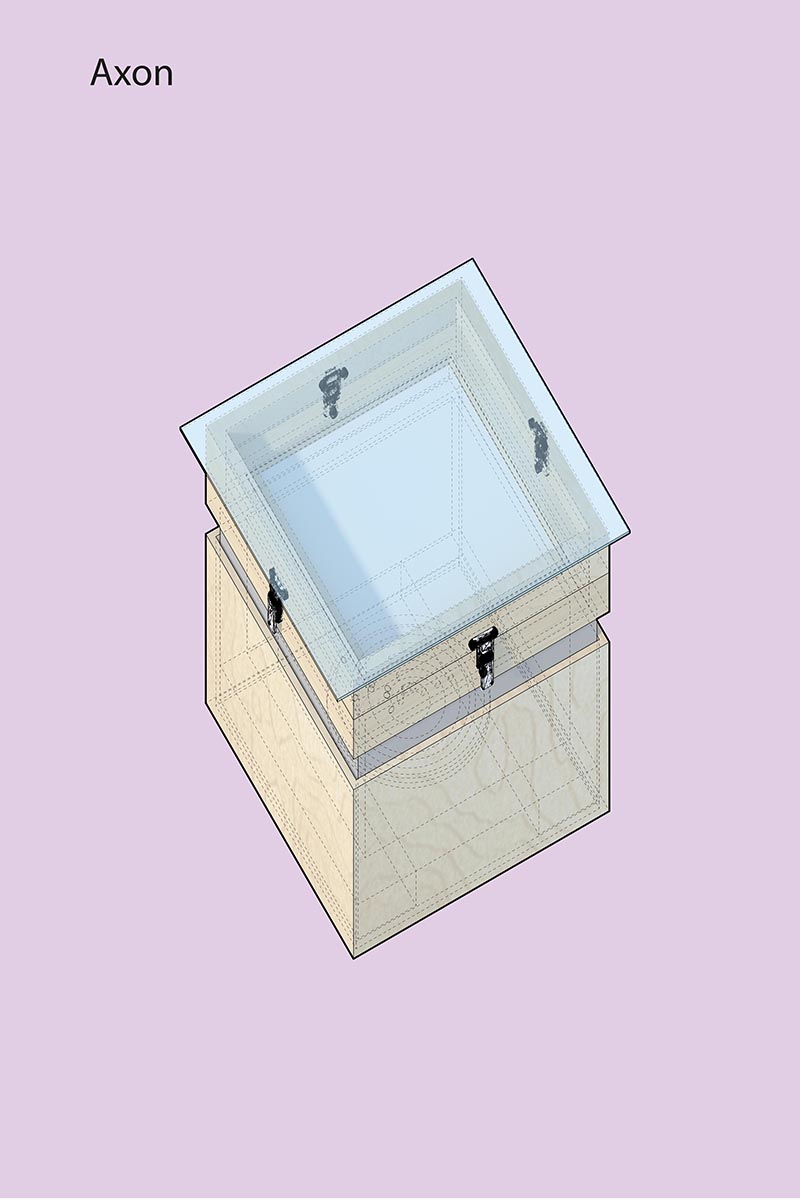
Thermoforming Appliance
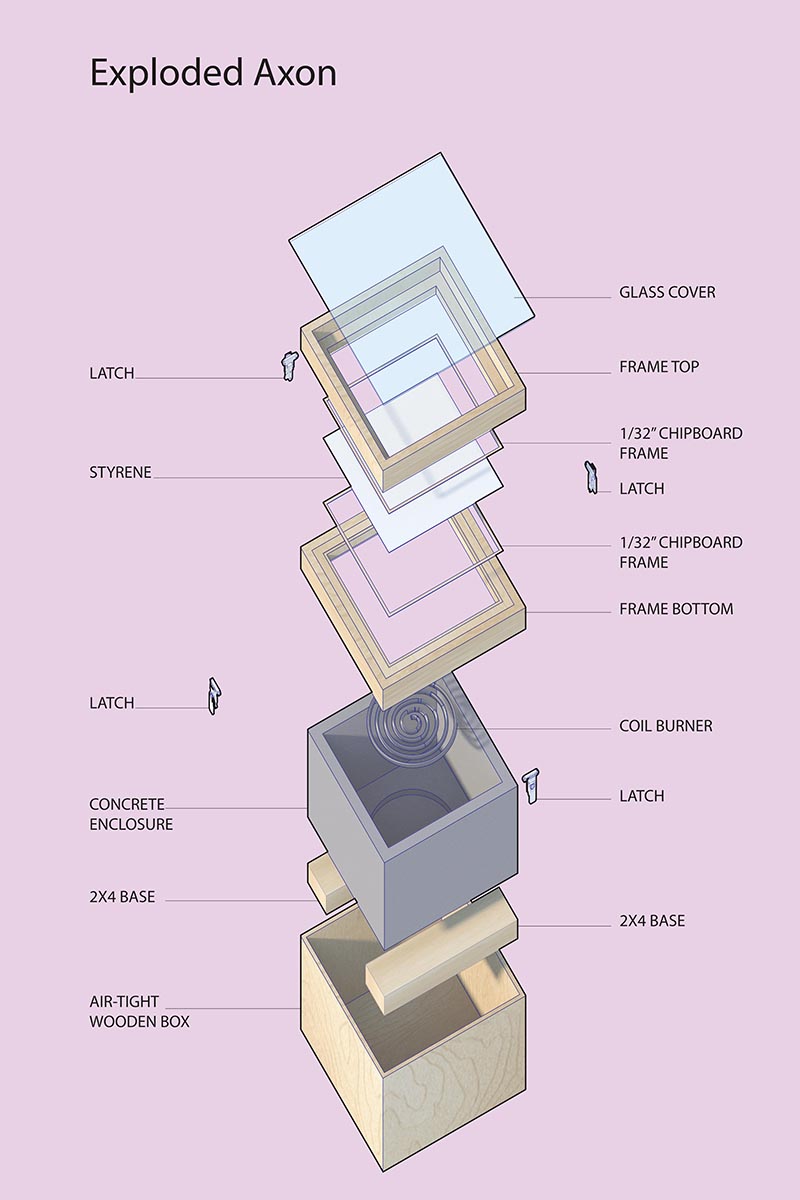
Thermoforming Appliance: Components
Thermoforming Appliance: Section
Components
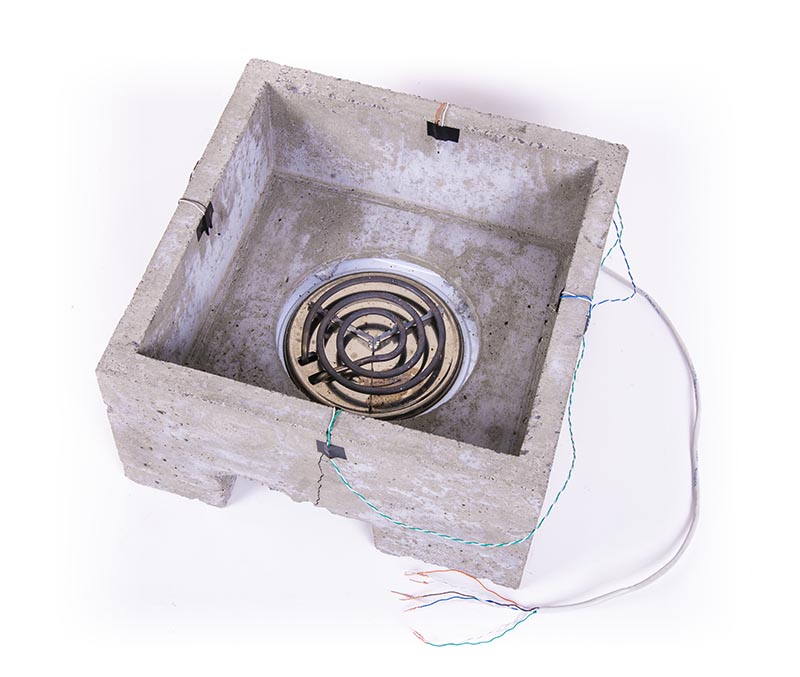
Thermoforming Appliance. Thermistors were used to measure temperature inside the appliance with Arduino microcontroller to control actuation time, pressure, and temperature.
Process

End effector (type1) test

End effector (type2) test
End effector (type 3) test
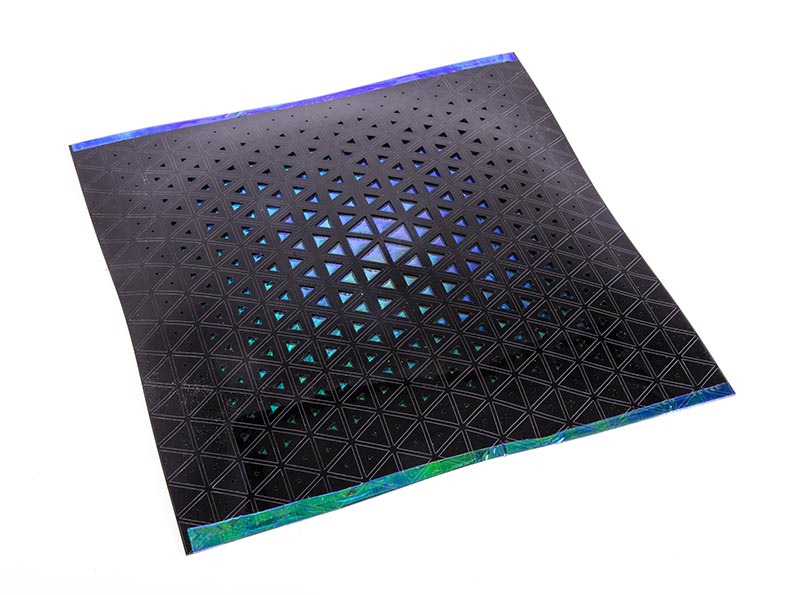
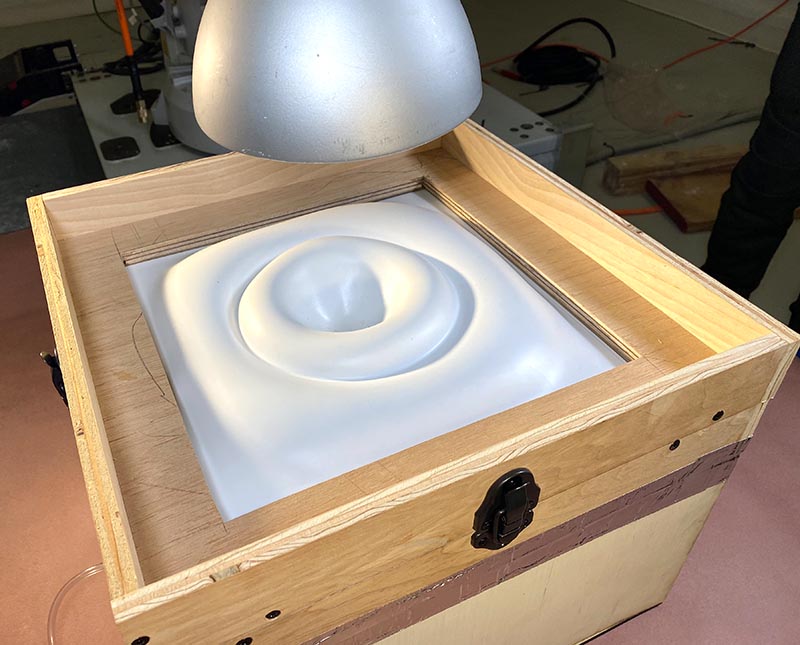
Thermoformed Panels

Formed panels (type 3)

Final Panel
Early Experiments
Conceptual studies
Conceptual Studies (Detail)